Showing posts with label frescos. Show all posts

Wednesday, 25 July 2018

WOYWW 477

Hi, welcome back for another WOYWW.. it's still way too hot here and of course I was away at a friend's in York last weekend (pics from the weekend here)  - so no crafting has been done.

York is such a beautiful city with loads of history.  I implore anyone who hasn't, to go if you can. I love it there.

So, no crafting as I said, but shopping was done (yes, the pre-order I mentioned last week are the new Distress Oxides - still waiting for them)  but one order has arrived...
 the new Paperartsy Fresco paints... 12 new colours (well, 11 new and one re-introduced but I already have some left so only needed to buy 11)


Looking forward to a play if - as they say - it is going to be cooler at the weekend (by cooler they mean a few degrees and possibly "only" 24 degrees. ) 
and a close up so you can see the colours a bit better!

Heatwave permitting, I'll be round to visit your desk soon! 


Friday, 26 January 2018

France Papillon - ALAD/ASAW - week 4, Emotions in Shapes

Facebook group challenge - France Papillon and Creative Butterflies group - ALAD/ASAW (a layer a day/a spread a week) -Emotions in Shapes...

Found this a hard prompt to get started with.. but everyone loves circles so I used circles again..
Took lots of daily pictures of each stage, but all by artificial light or flash, so bear with me!

 my page was pre-gesso'd, and I added distress oxides in Fossilized Amber, Twisted Citron and Salty Ocean... the Fossilized Amber didn't show up as much as I wanted, so added some Wild Honey over the top. smooshed and blended them with water a bit...
When it was dry, I carefully (with a silicone brush) added clear gesso to seal it. That is the extra texture you can see in the colours)
Day 2, the first circles - a fantastic stencil by Stencil Girl (well part of a stencil (I wish they'd put the names on the packets, I don't know what this is called)  anyway, I used Deco Art crackle paste and let it do it's thing


(another never used before stencil!)


GORGEOUS crackles!


 Day 3 was more stamping - using the same colour distress oxides and a Dina Wakley stamp (I love this stamp)
if you click on the picture you will see some of the Honey/Citron stamping


Day 4 was some doodling - I could see faces in the crackle shapes so I decided to emphasise them (especially the one top left) 
Day 5, more circles, another stencil.  This is a That's Crafty Dinky stencil.  First, I used Paperartsy Fresco paint in Bora Bora ( a gorgeous blue/green) and when that dried, "bumped" the stencil - moved it just a fraction off centre to the original position and stencilled Snowflake Fresco.


 you get a great shadow.

it's ages since I used this technique


Day 6, more stamping, a Paperartsy JoFY Mini stamp - little circles and a criss-cross hatch design that mimics the shapes in the crackle and the other circles.


Doodled over them with a couple of Stabilo felt pens


close up of the doodles


Final layer - day 7, today
I had to decide on a title, and I needed words on my page..

Much searching of stamps in my (large) collection... until I used one that was staring me in the face from a Dina Wakley set.


Art Is Life,
Stop Thinking, Just Create. 

Edged the page in Black Soot distress oxide
Looking forward to the next prompt tomorrow..

Sunday, 28 May 2017

For Manchester...

The tragic events of Monday night's bomb attack in Manchester have affected everyone. There are no words...

This journal page is to show solidarity.... the background started with loads of leftover paint and Lindy's sprays smooshed about,  and I can't remember what else!  I don't have any pictures of it in progress

the wall is Tim's mini layering stencil, with crackle paste (Deco Art) which makes lovely aged brickwork.

The bees are the symbol of Manchester that were already seen around to represent Manchester's worker history, but are now everywhere apparently (not living anywhere near I cannot say I have seen them, but the radio has been talking of it)....

The bees are by JoFY and stamped on the original (discontinued)  Paperartsy tissue paper (hoarding it!) and coloured with Fresco paints in Yellow Submarine and Brown Shed (over the black stamping)

Wednesday, 11 January 2017

WOYWW 397 - Several WIPs, that's what's on my workdesk!

Welcome to another week's desk sharing and hopping.  Head to Julia for the link up as usual - here  

Having got ahead of myself over New Year with a heap of January birthday cards, I had some time to play at the weekend... I find myself with 4 WIPS (work in progress) started...


 to the left.  my A5 sized journal mop up paint from the blue A4 journal page (right) - it's a combination of Frescos and then some Pebeo shimmery paint mixed with heavy gesso and spread with a palette knife...
the white canvas which is bleached out by the flash, has heavy white gesso stencilled (circles) and some Fresco blue stencilled circles and is probably going to be "Finnabair'd"  The flourish is the die I showed a week or so ago, cut from kraft card that was hanging around.


the blue journal to the right, is more circles stencilled in gesso under various blue Fresco paints, and has stamping in circles too.
  The canvas standing at the back is a fabulous Stencil Girl arched window over a background painted of various brown fresco paints. I've done something similar with this stencil before, on a smaller canvas, I just love the gothic look it has.

I tried to get a better photo, so changed the canvases about a bit, I think the texture on the white one shows up a little more in this version.

the window canvas has greenery at the front, using a Paperartsy stencil with matte gel mixed with some green fresco paint.  the bats are die cut (memory box)

So, 4 pieces on the go, none finished.. although the window one is nearly there, I think! Watch this space for more details maybe by next week.

I really had fun with all of these, it's been ages since I had a really good play, and it was fun to do so any different things at the same time.   Apart from the gothic window, I didn't know what I was going to do with any of them till I started.

I've managed to catch the cold that is going round the office, which is a pain, but at the moment it isn't too bad...so I'll scurry off to avoid sharing my germs with any of you...

Wednesday, 19 October 2016

WOYWW 385 - still no new stuff

at the risk of setting a bit of a habit, there is no new 'stuff' on my desk today for What's on Your Workdesk? Wednesday - week 385.  You can find the link up at Julia's
Not even any new art, either!  Well, not really

 because these atcs were posted off for a swap earlier in the week...


 so the floor looks like this today....
two pages in the journal painted (kind of) ready for "something" to happen to them soon...

the page on the left is a mop up using some Pebeo irredescent paint and dry brushed with gesso to knock it back just a little.  It goes a long way that paint, I obviously poured out way too much to get a full page covered with it!  the pink on the left is Bougainvillea Fresco paint, again left over from something or other....
maybe by next week I'll have done something with them to show you!

so, not much to show here, I'm off to check some more interesting desks at the Stamping Ground! 

Wednesday, 27 July 2016

WOYWW 373 - journal pages

Yet another week goes by and I haven't blogged since last Wednesday's post - so it's time to link up again with Julia's Stamping-Ground for the weekly desk-hop.

The new stamps I was waiting for last week, duly arrived but not till Friday I think it was..

I also did a bit more to the journal pages the stamps are resting on,

a bit of texture paste and some butterflies, another tree... still not sure if I'm done with it..

and finally, another page, the background is pinky purple brush wipings from the top journal page, covered in white crackle paste, and marked with a teflon comb (think it's designed for gelli plate marking) before the paste dried (and didn't crackle properly) stamps are by Seth Apter (circles) and Paperartsy and the image is one that my friend Lin sent me recently.  some lace from my stash and a piece of wide organza ribbon beneath the image, (painted with Fresco paint but most of it wiped off, just to give it a bit of colour to show up, although in the photo you it doesn't very well!)

Off to link up (well I'm scheduling this as normal but will link up in the morning) with Julia.

Sunday, 10 July 2016

Paperartsy Topic 13: Paper Piecing

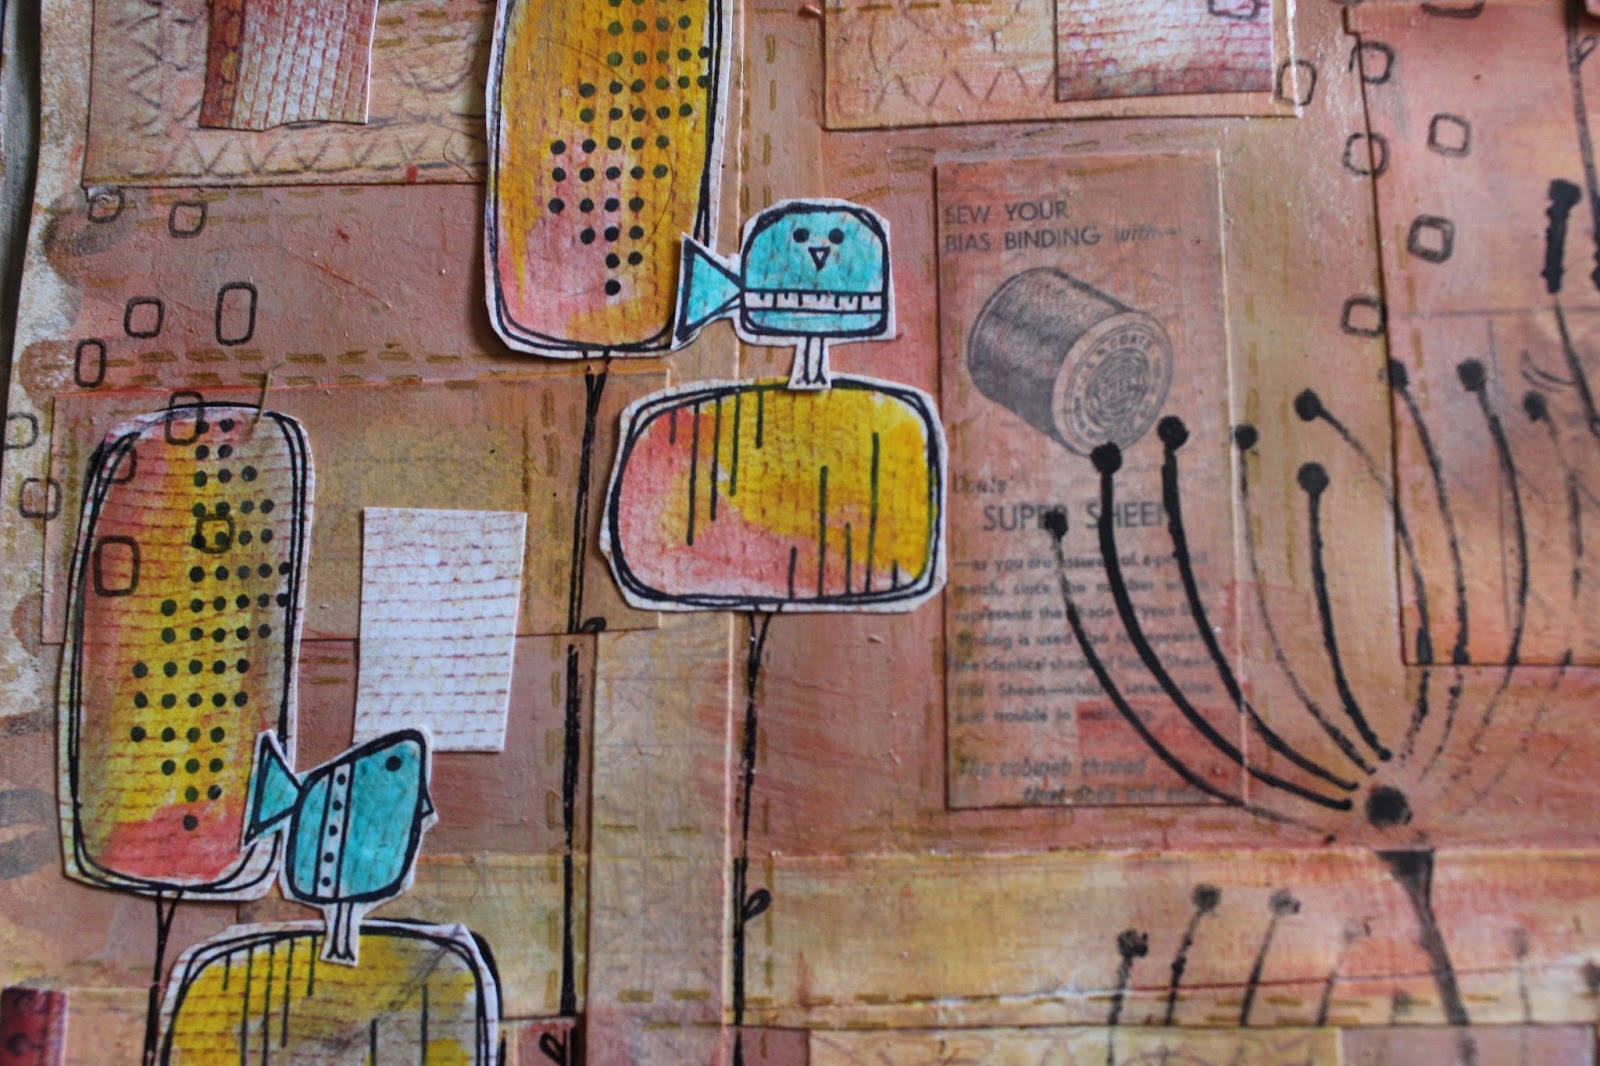
The last (couple) challenge completely passed me by, but the latest Paperartsy challenge is Paper Piecing and I have been blown away by several of the posts so far; Lin's fabric journal cover; JoFY's building block; Lesley's Owlandish; to name but a few.  

I decided to work in my A4 journal, on a background that I did start for the fabric challenge but never finished in time. (it was my birthday, my brother dropped in, what can I say?!)

 it had started out brownish, but I had grabbed a couple of pinky-yellow-orangey Prima paper sheets so brought the colours more in line - I used Frescos in Cooper,Coral, Pumpkin Soup.
 cut one of the papers into squares and the other into a mix of strips and squares dictated by the patterns on the paper
 before gluing them to the journal.  I painted over the more Frescos, adding some Satin Glaze and also adding some Concrete to mute it down a little
 I added some stencils (as per Lin's cover) and some stamping on another, plainer sheet of paper from the same Prima pad on which I stamped some of Kim's "flowers"

as there was no way I could have cut the stems, I stamped them direct onto the page and then laid the painted pieces on top
 I used the little scraps from round the flower shapes to fill some gaps, not adding any more paint, and then the last little piece to add the birds which P painted in Beach Hut
a few finishing bits of stamping, and it's done
love those little birds!

Entering the Paperartsy challenge here 

Sunday, 17 April 2016

Journal play

I've been in a bit of a creative non place at present, too many new things to play with I think... I am meant to be working on some altered playing cards for a swap, they're coming together very slowly and not really to my liking, and I am still thinking about scrapping some and starting again... anyhow,  some of them involved black gesso and I poured too much out..


so I used some on my journal page and the Copper and White Fire Frescos - took to it today with  a new Paris themed stencil and the Wanderlust stamp plate (stamped on Paperartsy tissue and coloured sparsely with the Frescos )
Scribbled a little round the tissue piece with some iridescent oil pastels I got in Glasgow last October

Thanks for looking.

Thursday, 26 November 2015

Paperartsy - topic 22 Masterboards

It's time for the last blog challenge topic of the year from Paperartsy - Masterboards - as you know I love making these, and had spent much of Sunday making them and turning them into Christmas cards. Sadly I didn't photograph any of them in the making, so would need to have another go (hurrah!) so I could enter the challenge. As always there was a fabulous video by Leandra to get us in the mood

But first, I'd like to say a big thanks to Paperartsy (and random.org of course) for the prize draw I won for the last challenge.  I have still to choose my goodies!

So, tonight, I have made another masterboard and even persuaded the computer to download the photos from the camera... eventually!
 I used shades of purple - starting with Eggplant, then Lavender and Moonlight, and a little Bougainvillea for some pink pop

I added a bit of Snowflake, as I wanted to be able to stamp on top.

Think there must be something on the underside of my craft sheet, that needs cleaning as I got lots of little dots where the brayer rubbed over the paper!
then I took some archival inks and some stamps - used Magenta Hue, Hydrangea and violet, and some circles (the large is a JoFY,the small joined ones are one of my fave SN plates) then some scratchy squares by Ellen Vargo.


took the Merry Christmas from HPXM08 and stamped it in black across the page, staggering the lines.
unfortunately the second row I managed to rotate the stamp for the first impression, so rather than throw the whole thing away (my first reaction) I embraced the imperfection and made it part  of the design..

It was looking a bit dark so I took some heavy white gesso, I was going to splatter it but it's too heavy, and wouldn't flick, so as I have an old toothbrush in my penpot, I used that and just dabbed the gesso over it - think it looks a bit like snow falling, don't you?

i'll make this into Christmas cards soon.  In the meantime I'm entering the Paperartsy challenge "masterboards" 

Wednesday, 19 August 2015

Dragons Dream - Tag it On

Time for another tag challenge from the Dragons - this fortnight, it's the turn of Silvia, and she wants us to use the number 2. 

I decided to not only use the number 2, but to make 2 tags.. twins, you might say!

I took two size 8 tags and a couple of stencils - the mini Labrynth (crafters workshop) and the numbers (paperartsy) using just the number 2 from it.  Paints are Blueberry for the Labrynth, and Lavender for the numbers.
My main image is a Teesha Moore stamp, on another tag - painted Banana before stamping and cut out the images.  mounted them on the tags so they could stand side by side, and stamped the text on a spare bit of another tag (from a Paperartsy plate)

Painted some white satin ribbon with more Blueberry Fresco, as I didn't have a ribbon the right colour (how does that happen? about a million ribbons and never the right shade...) 

Hope you will join in the challenge this time, it would be great to see more of you playing along.  Check out the rest of my team-mates here

Wednesday, 13 May 2015

DragonsDream - TIO - yellow and texture

Already it's time for another challenge from my team-mates at the DragonsDream team - this fortnight, Silvia is really challenging us with yellow and texture.  Yellow - such a bright, spring-like fresh colour.. Not one I use a lot of in my work (and definitely haven't got the colouring to wear it!) but here goes...

 the final tag.  Stamps by Paperartsy (words, and the bird) and Stampotique (on the background)
 I started by opening my tub of Heavy Gesso (Prima's) and applied some with a spatula to the tag, I didn't want to spread it out too thin or completely cover the tag.

I dabbed the spatula into the gesso to raise the levels and produce the bumpy texture you see..  I left it to dry on it's own, overnight.

 so, then for the yellow. I firstly took one of my recent purchases, the DecoArt paint - this is the Americana multi-surface satin paint, in Canary.  LUSH!  I dripped a little onto the tag, and spritzed with water, to get dripping going on..

Repeated until I got the look I wanted (still no idea where the tag was taking me at present!)


 Decided to ink up a stamp I hadn't used, the script bird by Sara Naumann for Paperartsy. Stamped it in black archival ink, onto a piece of cotton fabric.

Dried it, then  cut it out, before I painted it with Cherry Red Fresco paint, slightly watered down (mainly to aid the spread of paint on the fabric) - on the back of the cotton.

When dry, turned it over and painted a little more on the front, and sealed the whole thing with Fresco Matt Glaze, mostly to seal the edges so they wouldn't fray.


Took the French script stamp by France Papillon for Stampotique (also new to me) and Saffron archival ink, stamped randomly over the tag, using a piece of paper to mask areas I didn't want to stamp on.

Punched a circle from a piece of card, stamped take flight on it (Sara Naumann, same set as the bird) and using pop dots mounted it on the tag, over a few strands of fusible fibres (without fusing them!!)

A bright yellow ribbon finishes this off.

So, Silvia, a tough colour to pick but I loved it and am pleased with how it's turned out - so a big thanks!

Hope you'll pop over to Dragons Dream to see the other gorgeous tags, and we'd love to see you joining in - don't forget to use at least one real (rubber) stamp on your tag.  Thanks for looking!

Sunday, 10 May 2015

Paperartsy Challenge - Words

We're already at topic 9 for the Paperartsy Themed challenges - this fortnight, we're celebrating all things wordy in our art - single words, book text, phrases, script stamps... got all of those!

 this journal page started life with some leftover pink Fresco paint (Rose) and a little Buff... I added some Heavy Gesso randomly and added Bougainvillea with a wet wipe.

I took the French script Stampotique stamp and Magenta Hue archival ink, then stencilled the words in Bougainvillea ; before stamping the quote (Sara Naumann) and cut it up into small pieces.

Outlined the words with a soft charcoal pencil.


Entering the Paperartsy challenge here

Sunday, 5 April 2015

Happy Chickens

Happy Easter everyone, hope you're being good and staggering the chocolate....

I have been playing with some of Lin Brown's chickens in my A6 tiny journal today.
 the left page had some spare blue Fresco paints on, from another project and I used the new Memory Box circles stencil with Blueberry Fresco - just used it straight onto the right page.  I then gave the right page a wash with diluted Beach Hut and stamped some criss-crosses (Sara Naumann) in black.
 Wanted some more circles, took a Crafters Workshop stencil and Bougainvillea  Added a wash with diluted gesso and then stamped parts of the HotPick HP1304 script in Snowflake randomly - it barely shows up on the right page.

 Next, I stencilled 'love' and 'peace' (another Crafters Workshop stencil) in Grunge Paste - now for the chickens!
I wanted two, but not both facing the same way, so stamped on on card and one on tissue, and painted the "wrong" side - in fact, I painted both sides, to emphasise the colours - Banana, Bougainvillea and a little Tangerine Twist before cutting them out. I painted the reverse of the tissue with Snowflake and glued them to the page.

 added some of the light Prima paste, with a fingertip, to the tummies of the chickens, but it barely shows once it's dried, as it picks up the underneath colours


so I dabbed a little texture sand paste over the top
Finally, I added some Silver and Sapphire Treasure Gold round the edges of the pages and down the spine.

Had a lot of fun with this one!

Sunday, 29 March 2015

Paperartsy Challenge - Theme 6 - Grunge Paste

The new topic on Paperartsy, is Grunge Paste (or other texture pastes)  - love love love Grunge Paste! There have been some amazing projects so far, from Wanda Hentges's Garden Hanging, to  Lou Collins Wood Grain effect  and Liz Borer's Decorated Hand. 

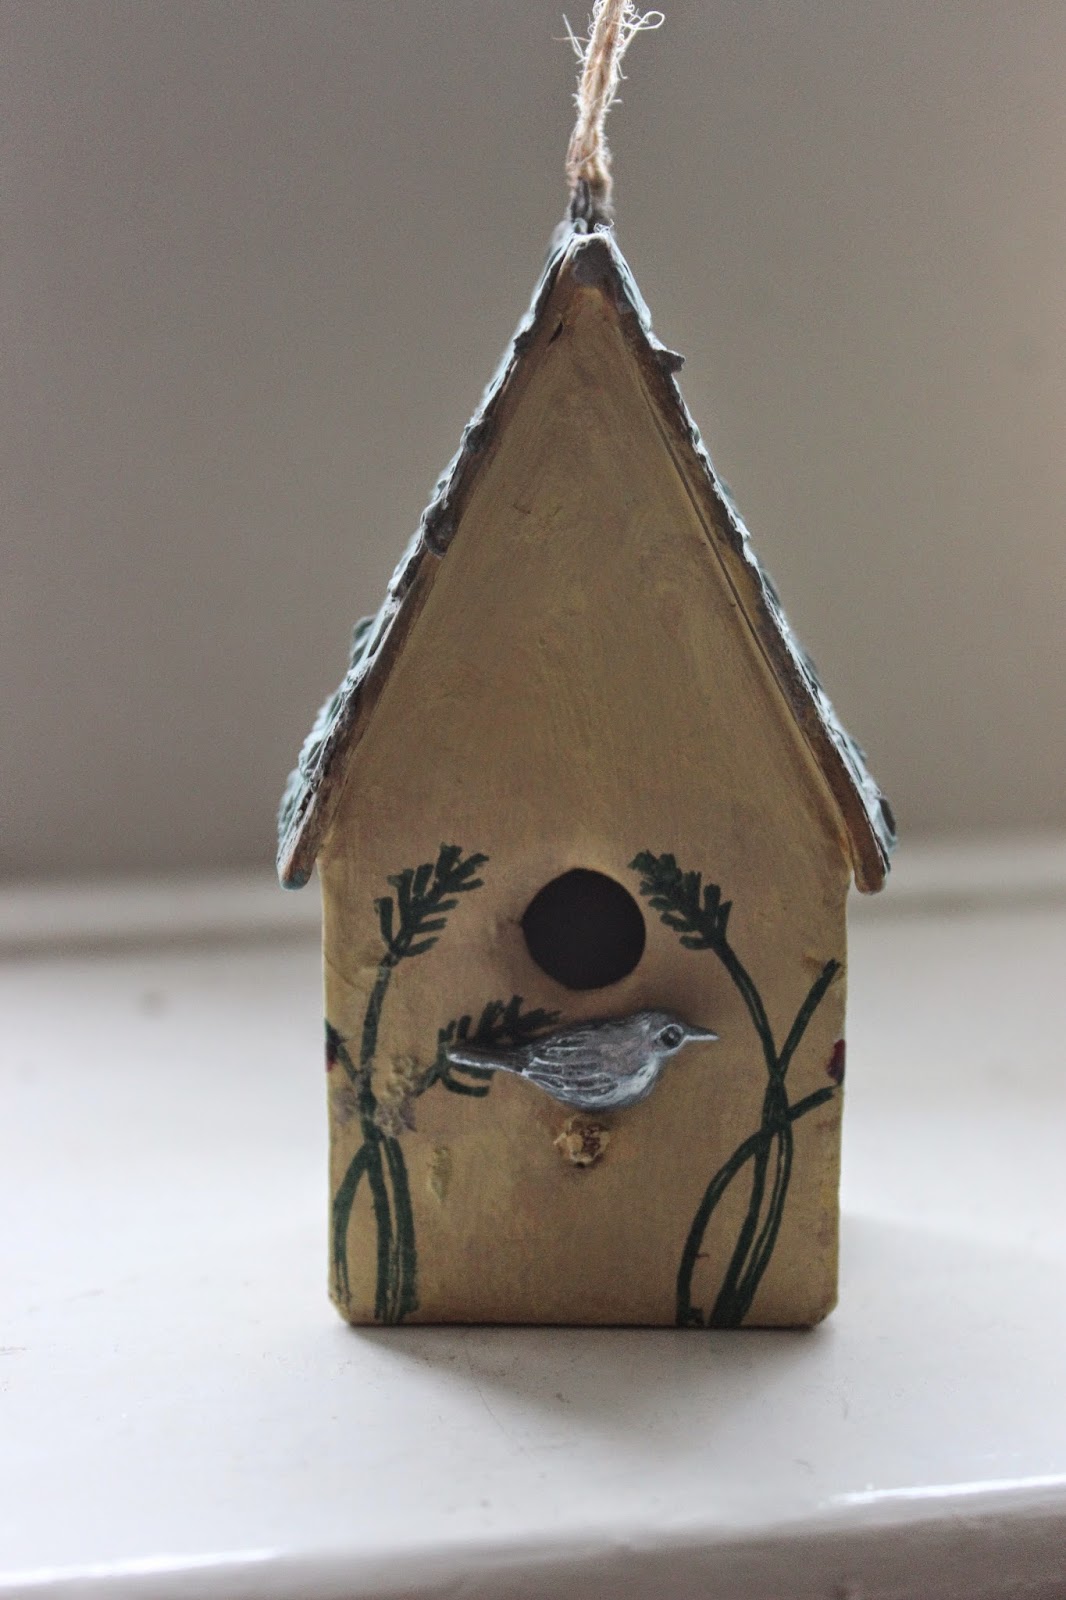
I loved the wood grain effect, but had an idea to alter a little papier mache bird house - which doesn't have must room to give it the full treatment like Lou... However...


 I bought this little bird house (and 2 others) at the Port Sunlight show last October.. finally been able to use one!

No early stage photos, got a bit carried away... started by painting the whole thing with Snowflake, then started adding colours.. used Brown Shed (too red) Chutney (too dark) Haystack.. ok. Added some little leafy flowery stamps from the new ELB20 on the front,in Library Green archival and on some scraps of tissue for the sides
the little resin bird was painted with French Roast and then covered with Sapphire Treasure Gold and fixed to the perch with Heavy Structure Gel.
 added some dots of red for the flowers, using a Liquitex paint pen before adding the tissue to the side.
The roof was made by mixing GP with London Night Fresco and adding a reasonably thick layer to the roof of the bird house.
I think the roofer must be very inexperienced, because the roof spacing isn't very even (on the other side particularly!)  - used a coffee stirrer to draw the lines.
Once the paste was thoroughly dry (overnight) I added a thin slightly watered down layer of Dusty Teal to give it a bit of colour.

 the back was where I wanted to try the wood grain effect used so beautifully on the Paperartsy blog  - mixed the GP with Chocolate Pudding and slathered it on - I just drew lines down with the coffee stirrer again, and let dry. Added a thin wash of French Roast and sanded back lightly.


 I really had fun with this one (not so with the photographs, it's damp and dull this morning!!) and entering the Paperartsy challenge here