Wednesday 28 August 2013

WOYWW 221

Welcome to another desk fest... It's time for WOYWW .  Thanks for your comments last week - and apologies for not making it to as many of you as I wanted...

It was suggested that I should a) open some of my drawers (oo-err!) and b) give you a view from the ceiling.. well a) I can manage, b) is a bit more tricky - but I have balanced on sofa and chair arms for you...

this from the chair arm under the window (the view you had last week I think actually)  Shame about the flash on my dolphin picture!


 some of the drawers, opened as requested.the wooden ones all have stamps in, and yes, they are double stacked and the cardboard ones (like the green one here) are ink pads, and other similar stuff (there are loads of them around the room!)
Standing on the sofa arm in the doorway.
and the "desk" itself... my new Wendy Vecchi archival inks which arrived at the weekend or last Friday, they are lush colours.

So, that's me today. what have you been up to? I'll try and visit as many of you as I can before work tomorrow (oops, I mean today!) and later on too...


Monday 26 August 2013

Take another look..

I have hidden something on this journal page but due to the poor light I don't think the camera has picked it up so you may not see it at all...

I was playing around with swirly stripes of paint (Irish Cream, Mocha Mousse, Mud Splat, Cheesecake, Cinnamon and Tinned Peas) earlier and it sort of looked a big mess.... but I started stamping over the top regardless...anything can be improved by stamping!!

 I used the seed-head type stamps from two of the Paperartsy Hot Picks plates and my new Wendy Vecchi archival inks (Cornflower Blue and Fern Green) then added the little owl from the Ink and the Dog plate (in Potting Soil and Orange Blossom)
and some sentiments in black archival.


and no, it's not the bird die cuts I'm talking about!

I have clear embossed a text stamp on the left hand page, but sadly I don't think you can see it!
(It doesn't help that some of the stamping on that page is a bit bumpy because of the grunge paste on the page underneath!!


***Edit***
Managed to get a shot of the hidden message

My heart is cracked in two.... well not really!

Helen Chilton was back at Paperartsy yesterday for her 10th Birthday Project for the blog.  She went to town with some crackle and tissue stamping on hearts, check hers here

I decided to take one of my Maya Road chipboard hearts and cut a template in a smaller size for the second one, which I then cut from the back of a lined notepad.

For my base colour on my hearts I used Limelight, and Eggplant for the cracked layer (and yes, mine worked this time too!)
 I don't have many Lynne Perella stamps, and none that would really fit the smaller heart, so went down the Ink and the Dog route with some stamps I got at Stevenage the other week.
 I followed Helen's instructions (and got to this stage in writing the post when I realised I hadn't added the Grunge Paste layer to this side of the heart... so did I leave it as it is... or add the GP???
 The reverse side, with crackle.  So. Did I add the GP stencilled layer or not.....

 well of course..!  I used the Tropical Leaf stencil and London Bus.. and because my hand isn't steady or any of my brushes small enough, I outlined with a blue gel pen.
Not sure which background I prefer it against, dark or light, both made it hard to photograph!!
 I am linking here for this week's Paperartsy challenge - hope you have a go too.

Sunday 25 August 2013

Borrowing a little bit of Lin Brown magic

Yesterday Lin Brown has been guesting at Paperartsy with a 10th birthday project that was just fabulous, but I didn't get time to complete it before the noon deadline for last week's challenges. Today, Leandra shared a video teaching us (reminding some of us who'd forgotten) how to line up their grunge flower die with the matching stamps so you get perfectly stamped images on the die cuts (yeah, right!!) However, I had a go and after I lined up all the appropriate stamps and marked off the notches on the dies, I was set to have a little play...

Following Lin's post yesterday, I cut an arch and covered it with grunge paste, then painted it with Fresco paint - it's not as red in real life - with cinnamon and blood orange, then brushed some Renaissance Treasure Gold over the high spots.

The Lynne Perella stamp is stamped on a piece of cotton and painted with Frescos from behind mostly, though some touches from the front.

The flowers are die cut and painted with Fresco's as in Leandra's video and Lin's demo's at art shows.

The leaf is one of Lin's chip pieces, painted with a mix of Hey Pesto and Limelight Fresco, then stamped with a Paperartsy Ink and the Dog background script (BG6)

Think I used Mermaid for the blue and Eggplant round the edges. The middle was Haystack.
 underneath the bottom flower is a fabric one, die cut from some heavy cream fabric I picked up in a John Lewis sale (and I have no idea what it is!)

But the lining up of the notches works (unless you trimmed your own stamps, so I agree with Leandra in the video, it really does help if you buy ready mounted stamps for this technique!!)
and painted with Fresco's to match the first flower (Smoked Paprika and Haystack)

We've been spoilt with blog posts today from Paperartsy - 4 in total, we've seen 3, one more to go, and it's from the amazing Darcy Wilkinson again, so anything could happen...

Saturday 24 August 2013

Journal Page inspired by JoFY 10th Birthday Project

Well, yesterday we were give a right treat by Jo Firth-Young for Paperartsy - a beautiful framed picture with her line of stamps.  I didn't have a frame to hand, so took some of the ideas and used them on a double paged journal spread.

 I started by using Grunge Paste (my new, nice and runny tub!) through the mini Art Is stencil randomly over both pages.
before painting with Ice Blue and Bora Bora Frescos, blending and merging the colours in the middle..


I added some Sage at the bottom, and adding some Limelight applied and blending into the Sage with a babywipe.

Stamped the large beach hut (JoFY16), using it as a shed, as Jo did, on white card, and two trees (JoFY15) in Wendy Vecchi's archival ink 'potting soil' and colouring with Frescos. I used various browns for the shed

Borrowed Jo's idea of stamping a whole load of leaves (didn't enjoy cutting these all out!!) on some green patterned paper, adding Hey Pesto to some of the paper first, for this I used Wendy's Fern Green archival ink.
There were as fiddly to stick to the trees as they were to cut out...

Stamped some of the grass border (JoFY11) in the same green archival ink across the bottom
and hiding inside the shed is one of the birds from JoFY15)

The other birds in the top of the left hand page are by Stampscapes.

A Carol inspired PaperartsyPencilCase...

A recycled Paperartsy pencil case, at that!! Carol was guesting on Paperartsy this week, as part of their 10th birthday celebrations and came up with some amazing projects... the ones involving sewing are beyond me (no machine, can't sew well by hand to save my life..) but her pencil case was beautiful..

I had one I decorated for a previous Paperartsy challenge, that I decided to re-decorate...nothing like a bit of recycling..

I grunge pasted the fish stencil over the top of the old design, before painting inside and out with Fresco blues - Bora Bora, Beach Hut, Mermaid, I think... different layers and blending went on....

I sanded back the fish to reveal the white paste and "painted" it with treasure golds - an un-named limited edition purple one, (middle) Ruby (left) with some of the purple over the top and White Fire (right)


 I used Lin Brown ELB04 new stamps and my new Wendy Vecchi Ranger archival inks in Cornflower Blue and Fern Green for the stamps - they looked like they would do as underwater ferns and fronds to me
 oops, you can still see some of the old swirls showing through the new paint inside... left it plain inside.
It is so dull and wet here, that I am having real problems getting any decent photos (good job this isn't for a #3up project, they'd be rejected for sure!)

I am linking my project here for the Paperartsy challenge

Wednesday 21 August 2013

DragonsDream - Tag It On - Challenge

Welcome to another TIO challenge from the DragonsDream Team - May choosing the recipe this fortnight, would like us to use the theme/recipe of orange, nature and time on your tag - and don't forget you must use one real stamp on the tag.

I cut a tag from cardboard waste from a package that was delivered and painted it with butternut and smoked paprika Paperartsy Fresco paints, wiping back some of the top layer to distress the look a little.  Stamped the clocks (a Paperartsy stamp) randomly over the tag in sepia archival ink.


Stamped and cut out 4 flowers on Clearly for Art by Wendy Vecchi, stamped a dotty background over the two larger flowers and painted the back with butternut Fresco paint.

Glued the large and small flowers together after heating them to curl the petals and found two teeny tiny clock faces in my stash for the centres.


The 'nature reveals' stamp is also by Wendy Vecchi.

WOYWW 220

So. It's Wednesday, it's silly o'clock and it's.... Crackerjack... Sorry, reverting to my youth there for a minute. Ok, so it's not Friday, or 5 to 5....those of you of a certain age and from the UK will probably remember the children's tv programme... anyway, I digress and Julia will be having a go at me for taking too long....

So, it's Wednesday and it's What's on Your Workdesk Wednesday day.... still don't know? Check out Julia's blog here for all the info and where to link up - come on, share your crafty space and bare all - you know you want to! Apart from being half way to the weekend, today is the day we love, for the day were we all get together and show our desks/ironing tables/cupboards/floors...

(will she ever stop waffling? OK then...)
 There isn't actually anything much on the "desk" today.. my journal you can just see, at the bottom of the photo- is shut (I published 3 blog posts on Sunday and since then haven't done anything) So I've taken a reveal all (well some) shot for you - it's been a while!

This shot is taken from gap between the spare chair (not that anyone can sit on it, it's got another box full of stash sat on it) and some of the piles of magazines under the window - towards the door... which you can see acts as a wardrobe overflow... perhaps I should have taken them down first!
I have been recycling from work too, the empty box is from some envelopes and is so sturdy it was too good to let it be thrown away - I am sure I can find something to store inside!!

And the canvas bag came from one of the big banks - it has a revolting plasticised advert on one side, but I am sure I can hide that somehow, and use it for something....don't you?! I have tried to see if it will peel off, but I think it's stuck fast, so will need hiding somehow... watch this space, but don't hold your breath, it may take a while!!

Better let you go, Julia will be waiting for you... have a good week all.

Monday 19 August 2013

Crafty Boots - It's Christmas!! in August....

Hi all. My teamie Sandra, for Crafty Boots, wants us to celebrate Christmas early this year... It goes against the grain a bit, to be honest as I can't get in the Christmas swing till - oh, November normally, lol!! But in the event I had bought a  new Christmas background stamp at a show last month so it seemed appropriate to give it an inking..

I took a deckle-edged card blank and stamped my background (it's a clear stamp by Woodware) in red archival ink and then added a Christmas tree (Denami designs) which I stamped on a piece of thinnish white card with Pine Cone ink by Versacolor. I cut it out and scribbled a glue pen over the tree, adding some microfine glitter. Glitter, AND Christmas, in August... eek!!    Still, it's one off the list for later in the year!

Hope you have fun with this theme this fortnight.

Sunday 18 August 2013

Art is blooming....

.... I am fairly sure (!!) this will be my third and final post today - I think 3 is more than enough for you all to plough through...

It started once again with the remaining paint from my first post of the day, the "thank you" for Paperartsy... I don't like waste, so always brush any spare paint onto a new journal page... and then later on I finished it off... using some new stamps in the process.

I kept to the pastel colours I'd used on the earlier piece, and added some grunge paste to one page through the harlequin stencil, and using Very Berry Fresco through the mini Art Is stencil on both, taking care not to go over the grunge paste.

Using cut and dry foam, added some Butternut Fresco to the grunge paste, sanded that, added some Moonlight too, and sanded that as well.

On the left hand page I used Butternut through the harlequin stencil to complement the grunge paste on the other side.

Then I used Blood Orange and Hyde Park on the stamps from Lin Brown's newest stamp set (ELB04 for Paperartsy)
 Stamped the Art in Bloom (ELB01) twice in black.

Thought it needed something else, so used my London Night Memento ink (pale grey) and the little script stamp from Clocks 1 (ink and the dog) plate, randomly in some of the gaps.
 

right, that's it for me, I need a cup of tea!!

O is for Overlap - Craft Barn Alpha Challenge

It's been a busy Sunday so far here today at 'H' towers.. this is my second creation already!

The new Craft Barn alpha challenge was announced this morning and it's O.  I was flipping through my dictionary and came across 'overlap'.  I then caught sight of my overflowing scraps box.... and the page was virtually done!

 the papers are from the fabulous Paperartsy Thorndon Hall collection and left over from a project that - ahem - didn't quite work out - hence being relegated to the scrap pile!

I cut them into strips and covered the page, overlapping the strips along the way.
 I then did some further overlapping with a Paperartsy mini flourish stamp MN96, which is a new one, and just gorgeous...

Think this must be the quickest ever!!
Thanks for looking.

Waterloo Sunset - Thank you Paperartsy Team

The lovely people at Paperartsy - Mark and Leandra, and the Design Team - this week have been totally rocking the blogosphere with some gorgeous projects and challenges and many of us have been totally - and in multiples - inspired to take part.  This, then is a little something for them to show my appreciation to Leandra, Michelle, France, and Liz, thank you ladies - and Mark, for editing the video so well!!

And it just happens that Hels' Sunday Stampers theme is 'Waterloo Sunset' - one of my favourite songs - with a theme of sunset/sunrise - and that is my colour scheme for this.  So I am entering her challenge too..

 Leandra's 
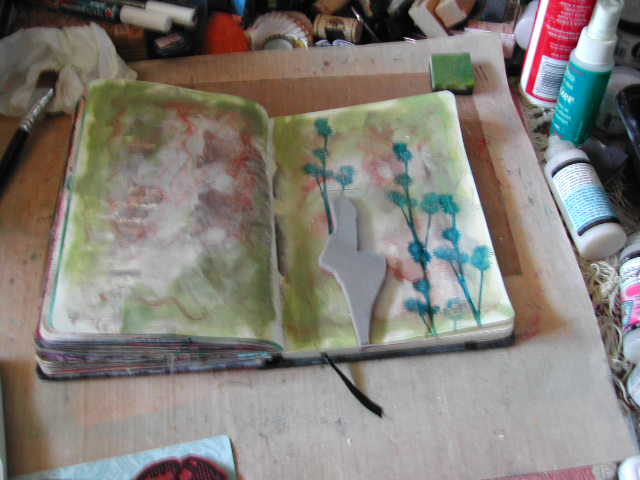
Saturday video  showed us how to stamp into damp grunge paste to get fab texture... I did this late last night before going to bed (I wasn't going to enter again at this stage, but couldn't resist having another go!)


 I was going to have a lie-in this morning but woke earlyish (as usual) and couldn't get this out of my head... so I had to get up and carry on!

I used Cheesecake, Smoked Paprika, London Bus, Butternut and Haystack I think.... blending with a paintbrush to get into the crevices of the GP.
Amazing how different it looks after blending!
 Then, as demonstrated in the video, sanded back over the GP.

I seem to have forgotten to take a picture of the step between the sanding and the finished piece - the camera battery was on charge!


but I stamped a mini script stamp in black over the card (it's Paperartsy super smooth cardstock by the way) and Jo Firth-Young's criss cross hatch from JoFY10  in Ripe Persimmon distress ink randomly, no acrylic block used.

I had a scrap of G45 paper in similar orangey colours, that I'd cut for something else and didn't use, and it's been driving me nuts getting in the way on the floor/sofa/scrap box ever since, so I gave it a watered down Snowflake wash to tone it down, and added the Tim Holtz Alpha Parts to spell out my greeting.

Tore some black card and mounted it up.

THANK YOU to everyone for a fantastic week on the Paperartsy blog - not sure how you'll better this one for inspiration, but I am sure you will come up with something!!

Saturday 17 August 2013

More mop up paint journal pages..

Over the last few days when I've been doing this and that for various Paperartsy challenges, I sploshed any leftover paint on my journal.... one was greeny pink (although it was actually blood orange with snowflake over the top) and one orangey-brown after the Michelle inspired frame...

Anyhow here they are, considerably messed about with!

 I love how the brown outline round the pinky/white looks like a boot!

I fell in love with the criss-cross thing that Michelle used so had to add it to the journal too.
added some circles (using a film canister) in French Roast and the butterfly swirly stamp is one of the bargain £1 stamps I got at Stamperama.
 Added some more white criss crossing over the top and some grunge paste through the Roman Numerals stencil

 I added Squid Ink with the back of some cut and dry foam. over the grunge paste, and when it was dry, sanded it back like in Leandra's video tonight.

I also added some white dots of Snowflake with the end of a pencil.
Finally I had to add some words, these are stamps by Dylusions, on thin white card.

Because it's too dark to take pictures without flash I can't get decent close ups of the sanded back grunge paste which is a pain!

Hoping this counts as an inspired by Paperartsy piece for this week's challenge.